Hot Rod Tachikaze (vertical stand)

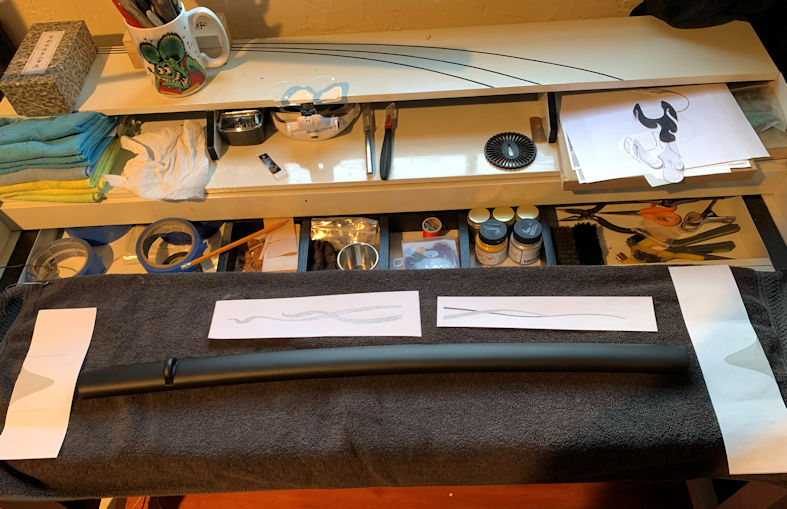
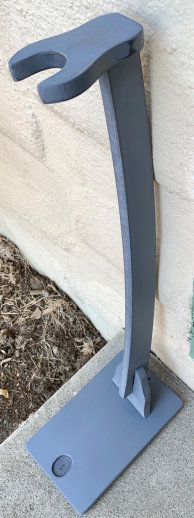
I wanted a stand to go with my hot rod katana, so I ordered a cheap vertical stand from an ebay seller for about $20, sanded it down, and primered it gray:

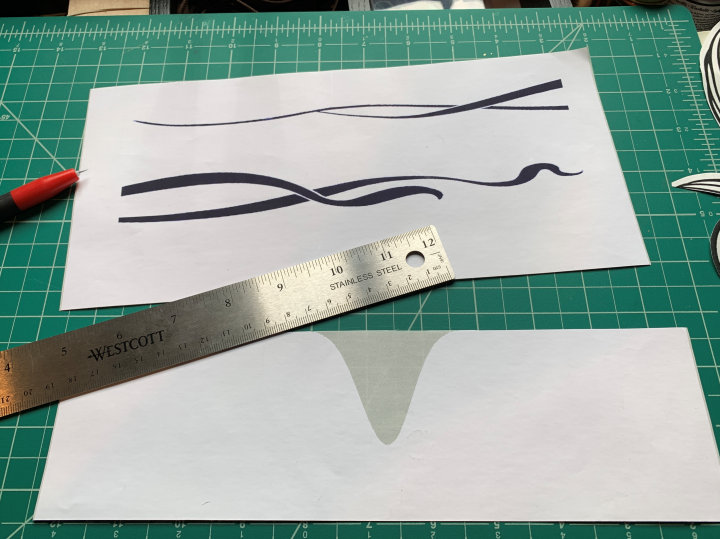
Another flame job would have competed with the sword, when the goal was to highlight it. So tried it out a lot of designs on paper before deciding what I wanted to do.

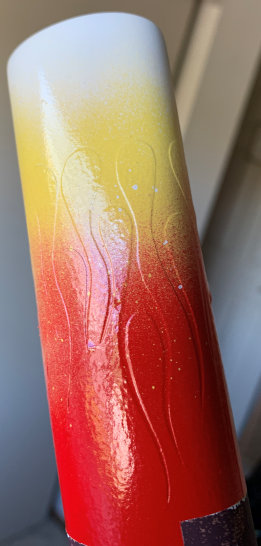
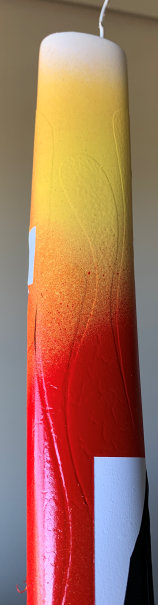
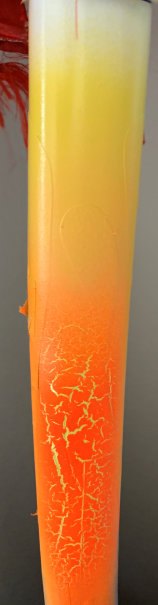
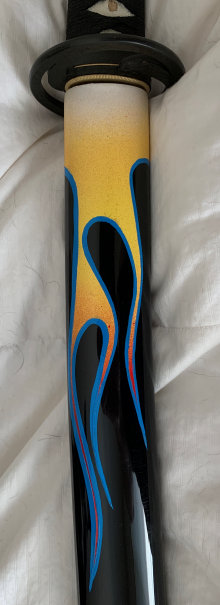
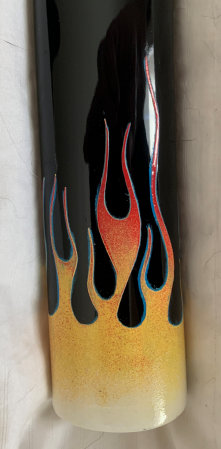
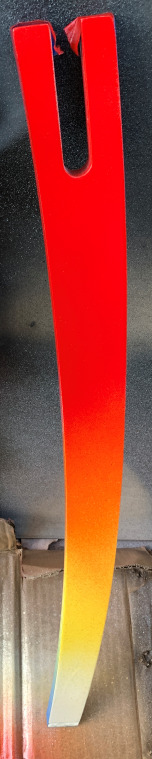
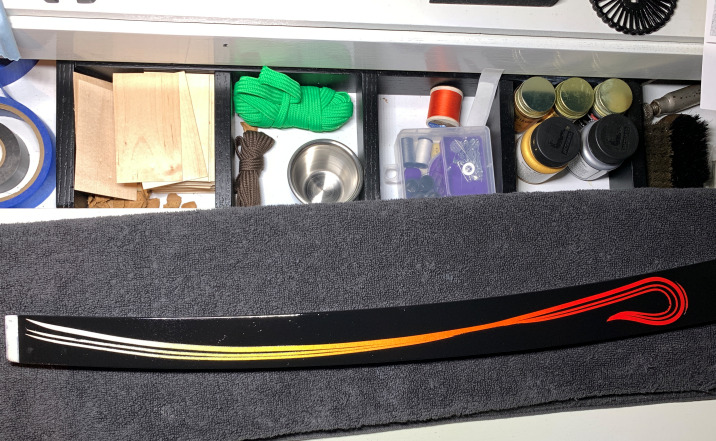
I used Rustoleum 2x rattlecans in white, yellow, orange, and red to do the fades:

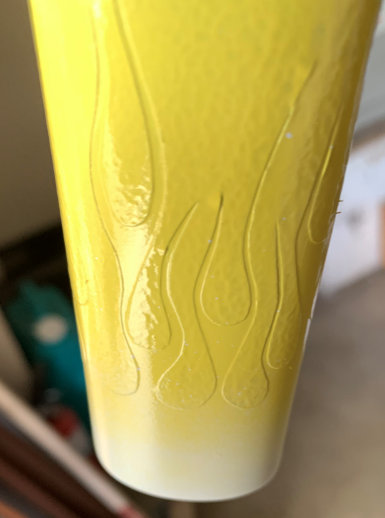
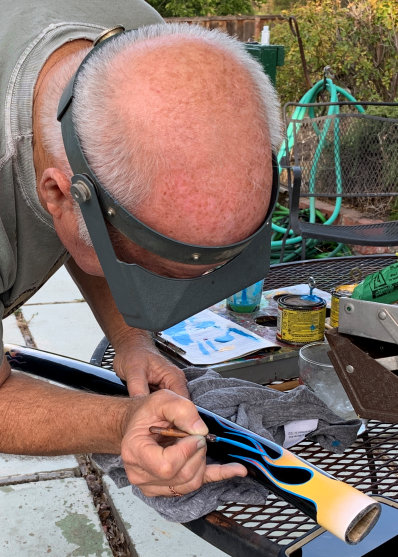
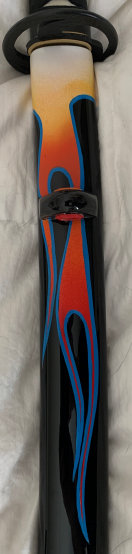
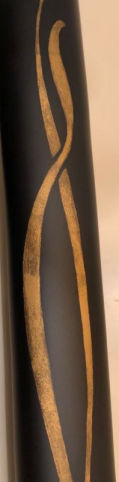
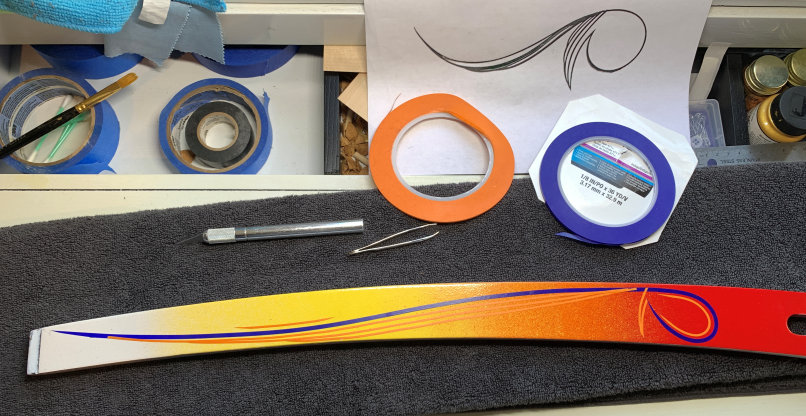
I used 1/8″ and 1/16″ vinyl fineline tape to freehand a pinstripe design on each side of the can-faded neck. I tapered the ends with an X-acto:

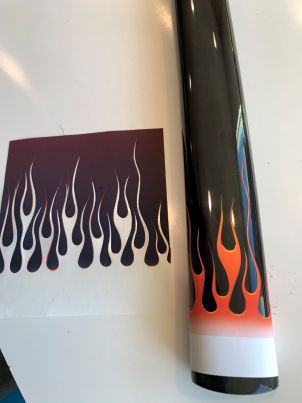
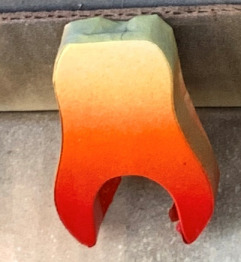
I tried out different flame designs for the top piece to be sure. I think I have commitment issues.

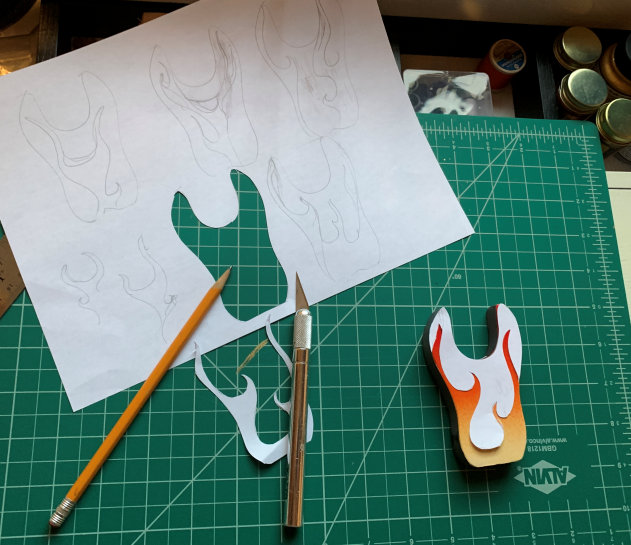
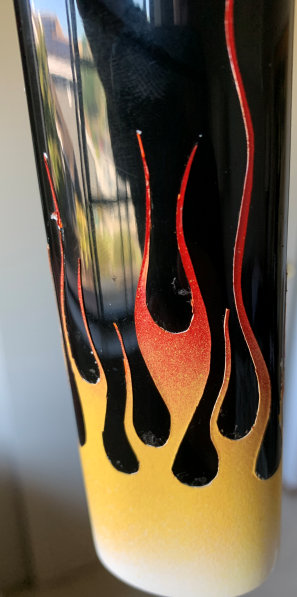
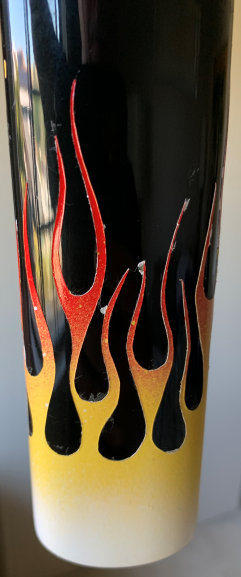
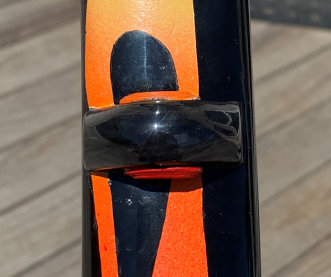
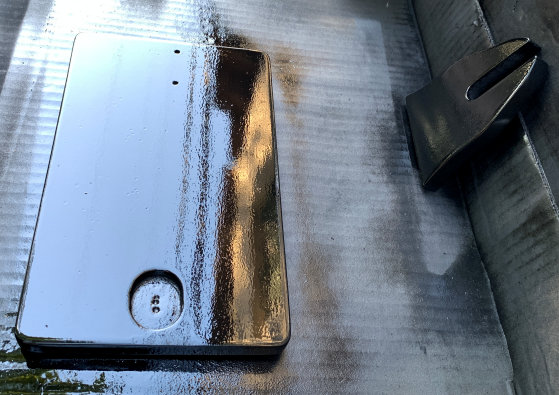
I traced the design onto adhesive vinyl, cut it out, and applied it to the top piece. Then I sprayed all the stand pieces with Rustoleum 2x gloss black. As you can see, the cheap stand surface is a bit orange-rindy. (That can also happen to the paint, if you spray too hard and/or too close, but I don’t think that was the case here.) Nowadays I’d coat it with watered-down PVA before primering and sand it smooth. Live & learn, yah?


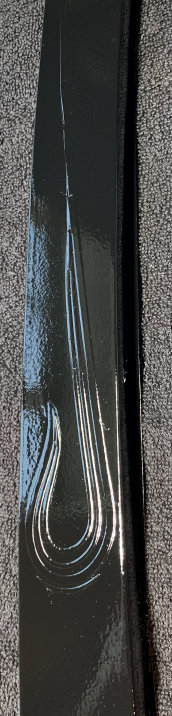
I pulled the tape from the top and the neck. (Things I Learned the Hard Way: pull by sort of folding the tape back on itself and keeping close to the surface, rather than pulling up):


Another reason to try for a super-smooth paint foundation: The orange-rind surface made it hard to get crisp, clean edges with the striping tape. Live & Learn again! I cleaned up the edges with an X-acto:

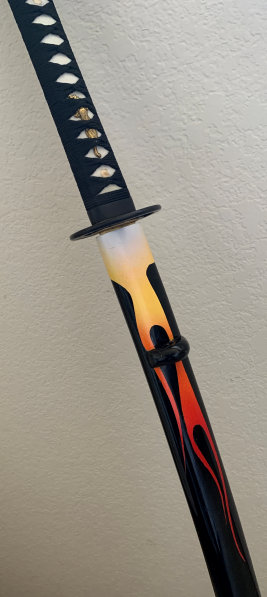
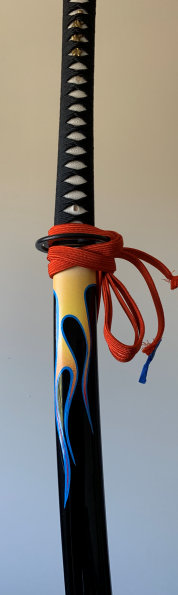
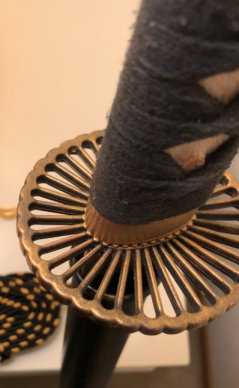
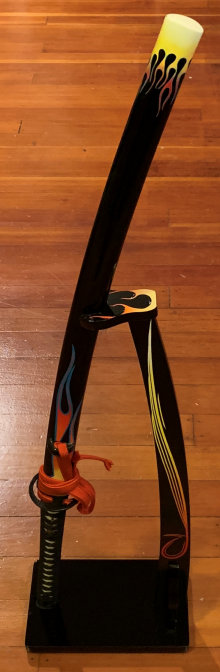
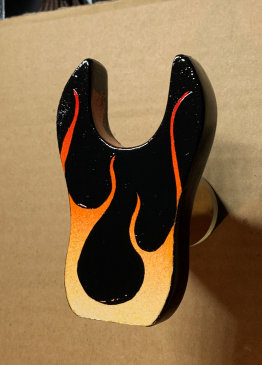
I clearcoated with three layers of Rustoleum 2x gloss and it smoothed out the orange rind pretty ok (that was lucky, really). I let it cure for a week, then waxed with Turtle Wax, buffed it, and put it together. I didn’t like the idea of the top piece & bottom divot’s bare wood rubbing against the saya, so I glued soft rubber lining meant for instrument cases to the cutaways. Moment of truth with the hot rod katana on it!

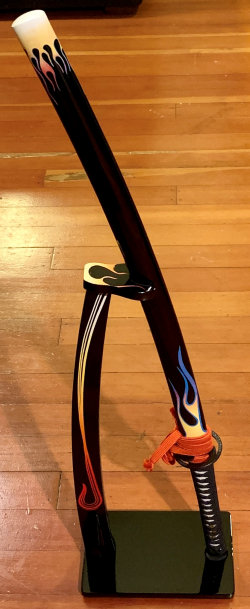
It’s now beside a wardrobe at the entrance to my home office, and I usually grin when I walk by it. It makes me happy.

Hot Rod Katana

Years ago I learned how to do rattlecan fades from hotrod-flaming a PC case, monitor, & mouse, and I really liked the idea of doing a classic hotrod-flamed katana.

This was a Ronin Katana Dojo Pro scratch & dent shinken (live blade) I bought for about $190. At this time I was still nervous about disassembly, so apart from lacquering the ito (handle wrap), I didn’t modify the katana & fittings at all. This was all about the saya (scabbard).

Rather than sand it down to bare wood, I masked the areas that wouldn’t be flamed. Then I laserjet-printed hotrod flames onto adhesive vinyl and cut out the flamed area with an X-acto (still didn’t have a Cricut printer/plotter yet). I applied these to the ends of the saya. The pic below shows one of the stencils, with the cut-out flames wrapped around the saya to give me an idea what the painted version would look like.

I used Rustoleum 2x rattlecans to fade the custom flame stencils with white, yellow, orange, and red. (I’ve found that a wire coat hanger bent into an S at one end and shoved into the saya is great for hanging them to paint & dry.)

Surprise! The orange paint crackled and I had to redo everything. Man, I was so happy with that fade, too.

But I still ended up pretty happy with how it all looked after I peeled off the vinyl:

The edges needed cleaning up, and I carefully scraped them with an X-acto. The flames were going to be pinstriped, so I didn’t need to be too obsessive about it. This is after edge-scraping:

I ordered an orange silk sageo (ribbon cord) from the sadly defunct Ryujin Swords (UK), and I painted the shitodome (metal washer) to match.

I am nobody’s pinstriper, and my best friend Ken Mitchroney — director/animator/race-car driver/locomotive restorer/Ninja Turtles comic artist, and my Fata Morgana coauthor — was an expert. (He worked with Ed “Big Daddy” Roth, who created Rat Fink.) Ken did the pinstriping, bless him.

When I told him about the paint problems I’d been having, he said he hated working with rattlecans because too much was unpredicatable and inconsistent. He admired my can fades but said I’d be so much happier with fades and consistency if I learned to use an airbrush. Which definitely put a bug in my ear.

For the final polish, I didn’t use rubbing compound because there was a chance it’d damage the pinstriping, and I didn’t clearcoat the flames because it would have been clearcoating the already-coated black sections of the saya. D’oh. So I just waxed it with 3-4 layers of Turtle Wax and called it a day. (Well, a whole lot of days.)

If I had it to do over again, I’d sand the saya down to bare wood, primer it white, and fade the ends (I have an airbrush now). Then I’d mark out the flames with fineline tape, mask them, and paint the saya black. Remove the tape, pinstripe the flames, and clearcoat the whole thing. Soooo much less work.

Even so — especially considering where I was in my learning process with all this — I was so happy with my hotrod katana that I decided to customize a vertical stand to match it. I’ll post that next.

Art Nouveau Iaito

art nouveau iaito

Modifying low-end katana has been a great, low-risk way to learn. I’ve made a lot of mistakes (still do!), but they weren’t $10,000 mistakes that ruined a work of art or piece of history, and they let me learn the hard way without causing much damage.

This was one of the first customizations I did, in 2021. I’ve always thought the elegant shape of a katana suggested Art Nouveau’s trademark curvilinears (unsurprising, since Art Nouveau was heavily influenced by traditional Japanese design), and thought it would be fun to make an Art Nouveau-themed iaito.

It’s a $70 ebay sword. I sanded the saya (scabbard) down to bare wood and primered it gray with two coats of Rustoleum 2x. The black was Design Master ubermatte Ink Tinta. I hadn’t got an airbrush yet; it was rattle-cans all the way.

I can’t draw worth a damn, so I found a Nouveau border I liked, elongated it quite a lot in PaintShop Pro, and printed it onto adhesive vinyl. I cut out the design with an X-acto knife (I hadn’t gotten a Cricut printer yet), and applied it to the black-painted saya. This may have been my introduction to the unique pain in the ass that is the saya shape, when it comes to attempting symmetrical design, straight lines, and applying adhesive stencils.

I wanted a curvilenear shape on the ends of the saya. I realized that the shape I wanted was basically a bell curve, if you unrolled and flattened it. I’m a bit embarrassed to admit that the graphic I found that best fit this was the CDC bell-curve graphic that was everywhere at the beginning of the pandemic when we were supposed to be flattening the curve. I printed it onto adhesive vinyl, cut out the shape, and applied it to the saya.

I wanted a slightly worn, antiqued look, so I brushed Rub ‘n Buff Antique Gold into the end-cap stencils, the fittings, and the tsuba.

I polished the 1040 steel blade with Peek metal polish. Back then I was afraid to disassemble anything, so I did all the painting & polishing by masking off areas. Nowadays I know better.

I lacquered the ito (handle wrap) with two coats of Minwax gloss polyurethane, clearcoated the saya with matte spray polyurethane, and was pretty much done.

Over time I discovered that the Rub ‘n Buff wears away pretty quickly with handling, and I subsequently sanded everything down again and repainted, this time using Liquid Leaf Classic Gold. Once I became more comfortable with an airbrush, I did it all one more time. I’ll post that version later. I love it.

As I said, this was an early effort, and I learned a lot. It’s been my go-to training iaito for a few years, and I’m very fond of the little guy.

Yeah, so this is a little late

Yes, I’m still writing. It’s not easy for me, though why that may be so is a topic for another day. 

For now I’m going to kind of ease back in by posting walk-throughs of airbrush projects I’ve done in the last few years. I realize that seems like quite the non sequitur; I’m asking your indulgence as I take baby steps here.

I started taking Batto-Jutsu, a samurai sword art, just before the pandemic, and earned my shodan this year. This would put nearly 50 years between my black belt in Tae Kwon Do and the new one, which I find sorta funny and sorta cool.

Katana have been a big deal in my novels Ariel and Elegy Beach, and I’ve owned a few cheap iaito (dull practice swords), and trained with them (unsupervised and wholly ignorantly).  Once I started Batto, I found I really wanted to learn more about the swords themselves: Take them apart, clean them, repair them, maintain them–and customize them.

That entailed tons of tutorials helping me learn cleaning, assembly, rattle-can painting, handle-wrapping (tsukamaki), airbrushing, and a host of related skills. Thank god for Youtube.

So I think I’m just gonna post walk-throughs of some of these projects for a while. Partly because this is a new endeavor for me even while it’s part of a lifelong undertaking in martial arts that I haven’t talked about much. And partly, as I said above, it’s to help get me get used to doing all this again.

So I beg you be gentle as I get my sea legs back.