
In 2019, not long before I started learning batto-jutsu, I bought a gunto (WWII military samurai sword) at a flea market. The blade wasn’t stamped-out and there was no serial number, so while it probably wasn’t very valuable, at least it wasn’t a mass-produced factory blade from the period.
There was no signature or info on the nakago (tang). The blade was in good shape. I didn’t think it was very new, because the hamon (tempering pattern) was tired and nearly worn or polished out. But I also didn’t have any reason to think it was especially old or valuable, either.
The saya (scabbard) was completely rattan-wrapped and painted a brown that had seen better days. The fittings were brass and had heavy patina. The ito (handle wrap) was worn and loose, though it still seemed too new to date from WWII.

It seemed at least worth the modest investment as a restoration project. It was one of the first katana I worked on, and I made a lot of mistakes, but I learned from them.
I took everything apart, and, surprise! (Repairman Voice: Ah, yeah, well there’s your problem!) Handle cracked in two:
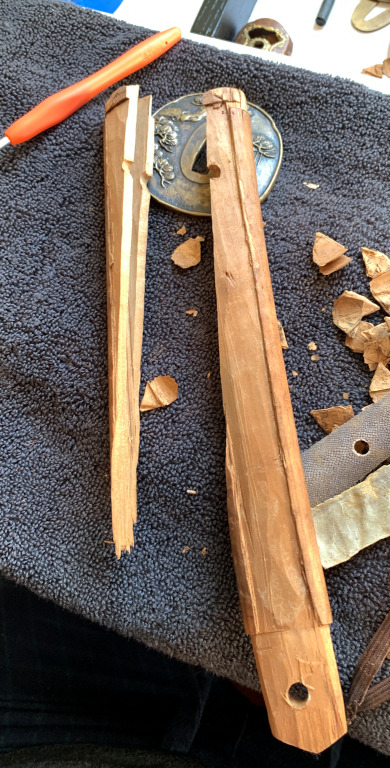
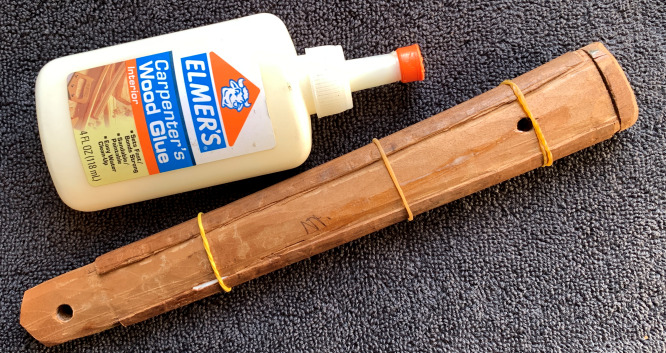
The break was pretty clean, though, and easily wood-glued:
The hishigame (folded paper triangles that help give shape and stability to the diamond shapes of the handle wrap) were old Japanese newspaper. Definitely keeping those! (Maybe there’s news about stalling MacArthur in the Philippines.) The samegawa (ray skin that helps bind the wrap) were several smaller, badly shaped pieces in poor condition.
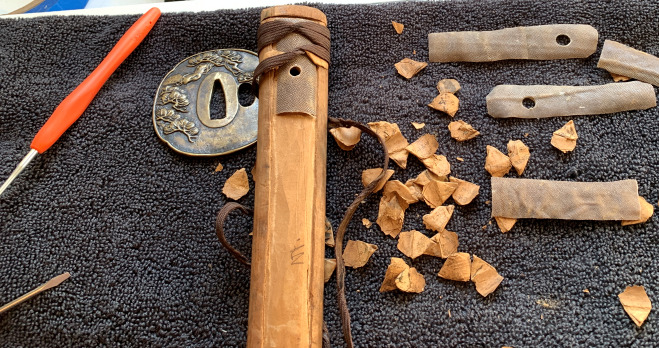
I bought a modest rayskin from an ebay dealer in China. (I still have mixed feelings about this, as I don’t know how humane or indiscriminate the skin harvesting is, and I don’t want to help enable something awful.)
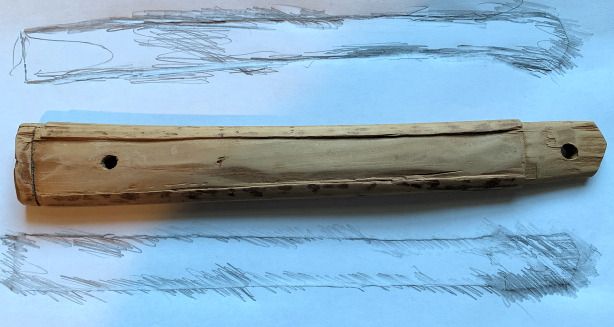
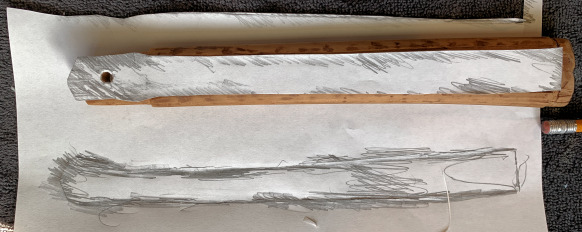
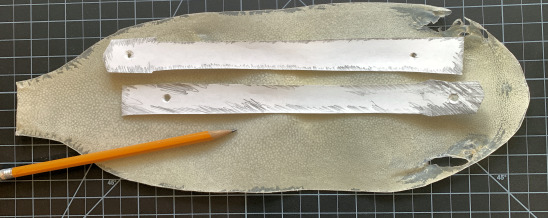
I made rubbings of the tsukka recesses and cut out their shapes:
(Steve! Are you drawing dicks at your desk again! What did I tell you?)
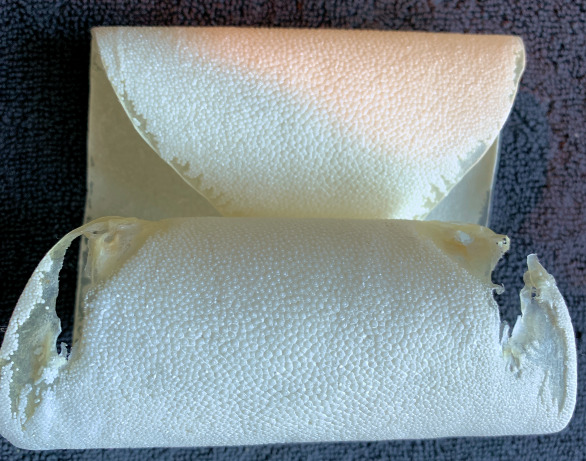
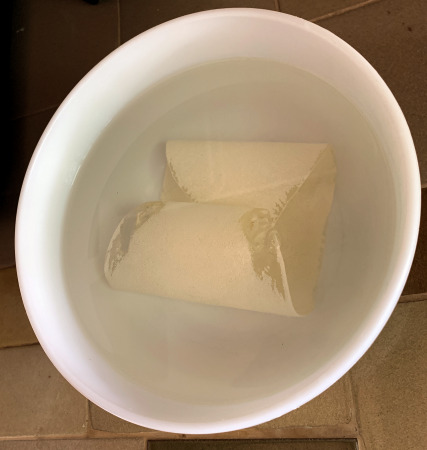
Anyway…. I soaked the rayskin in water for a few minutes to soften it:
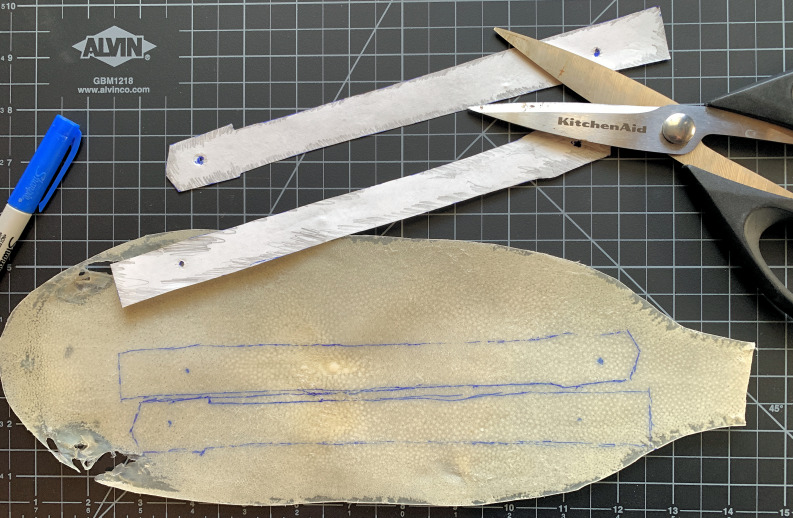
Then used the rubbing cutouts as stencils to mark the shapes in the rayskin:
I did a whole bunch of things wrong here.
First, I didn’t realize that the skin shrinks a decent amout when it dries. So the shapes I traced onto the wet skin would dry smaller.
Second, I didn’t realize that there was a “grain” to the skin — that is, there’s a direction in which the tiny hooks at the top of the nodes will more strongly bind against something. You want them positioned so that the hooks are pointing toward the tsuba. It gives the strongest bind against the ito, preventing it from slipping when the sword is swung.
Third, I didn’t turn the stencils face-down against the smoother back of the rayskin and trace that way. Not putting them face-down meant that the cut shapes were actually upside-down: To properly fit according to how I’d cut them, the hooks would be against the wood and the smooth side would be up.
Naturally I realized this after I cut them.
Finally (yep, four big mistakes here): I used decent kitchen shears to cut the rayskin. Yeah, no. Don’t do that. This stuff is amazingly tough and abrasive, and I ruined the shears. Tin snips next time! Also: Probably best not to ever fight a stingray.
I didn’t have enough good rayskin remaining to redo the shapes, so the best I could do was to swap their intended sides. They fit better than I had a right to expect, to be honest. (Anyone who does this professionally is probably crying by this point. I apologize.)
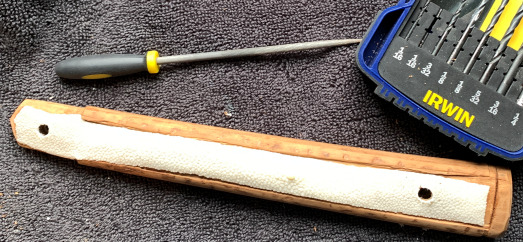
I glued on the samegawa, wrapped them tight, and let them dry. Then I drilled holes at the mekugi-ana (the hole for the pin that goes through the handle and tang to secure the handle to the sword) and used a small round file to smooth the holes and edges.

Brief philosophy aside:
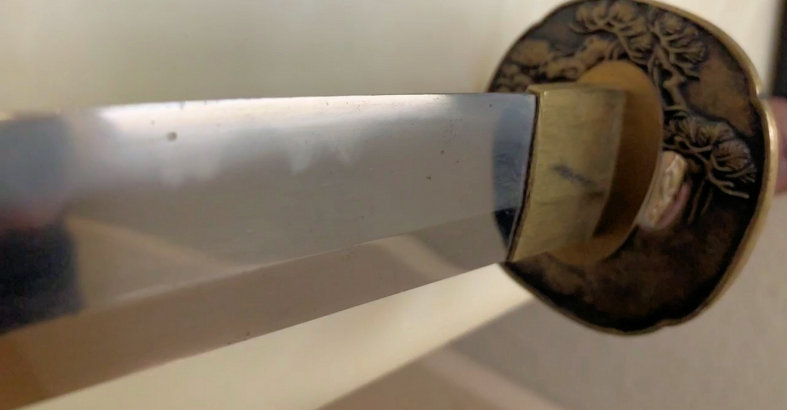
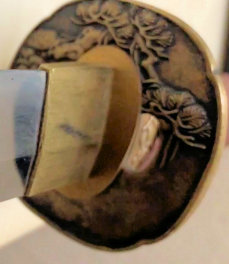
I was in a quandary about the fittings. How far do you go with cleaning & polishing? This was an antique; making it bright, shiny, & new didn’t seem right.
I spoke with a vintage-jewelry-expert friend about the philosophy of restoration. There’s a lot of argument about how far to take it, the degree to which you can go before you’re actually devaluing the item and disrespecting its provenance.
There’s also the Ship of Theseus problem: Worn parts get replaced over time, until nothing left belonged to the original. It’s a big issue in restoring paintings.
The discussion was very helpful, and I ended up resolved that I would clean & polish for appearance but leave enough patina to make the age apparent. Keep what matters, replace what doesn’t. Samegawa, ito, & sageo (the securing cord on the scabbard) were designed to be replaced. Koshirae (decorative fittings) could be, but should be restored best as possible out of respect for their origin. Ultimately, though, all of it is a support system for what really matters, and what absolutely should not be screwed with: The blade.
So:
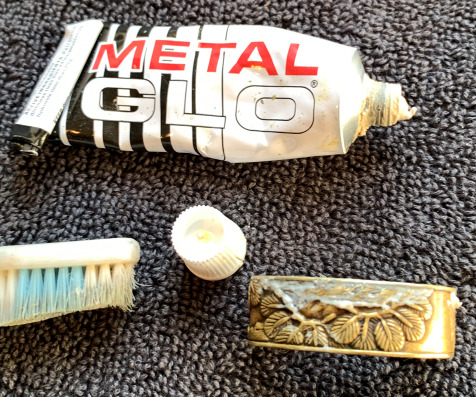
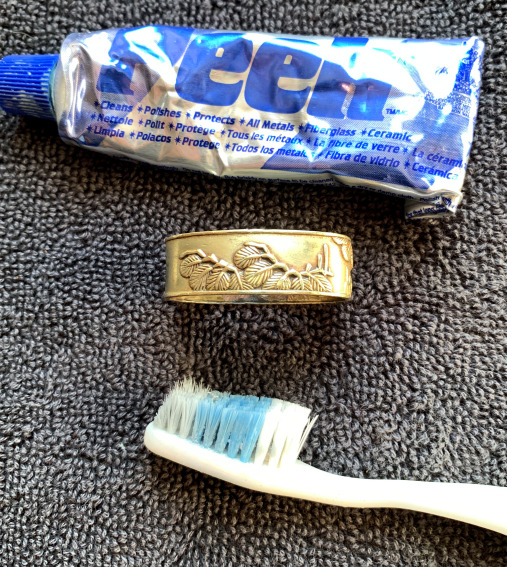
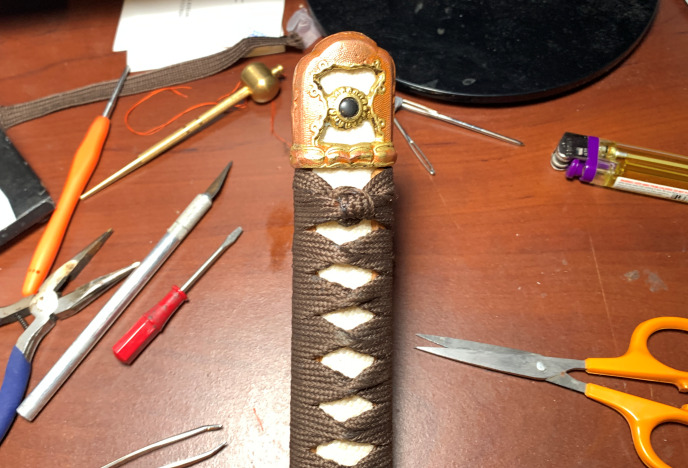
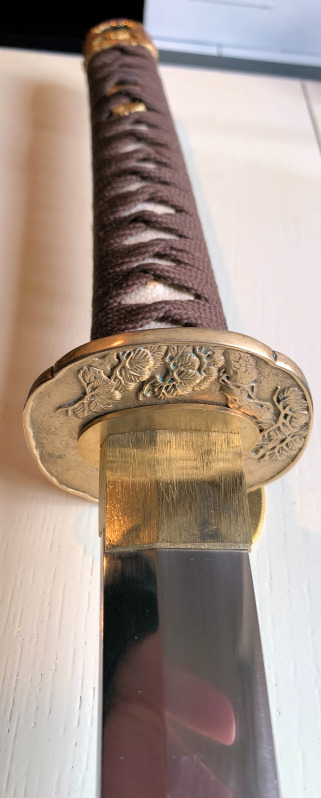
I cleaned the fittings with Brasso, a hard-bristled plastic brush, and a toothbrush (metal bristles would have been damaging).
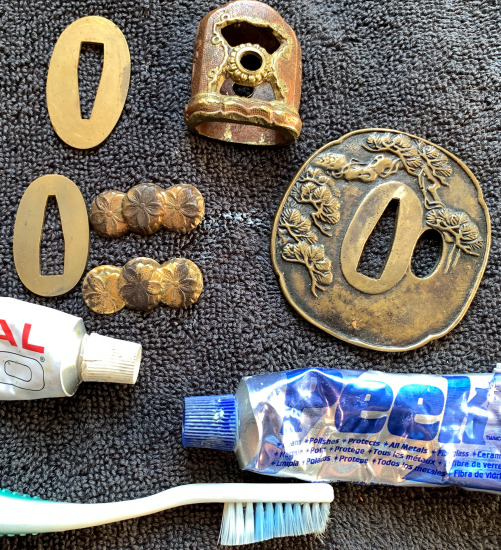
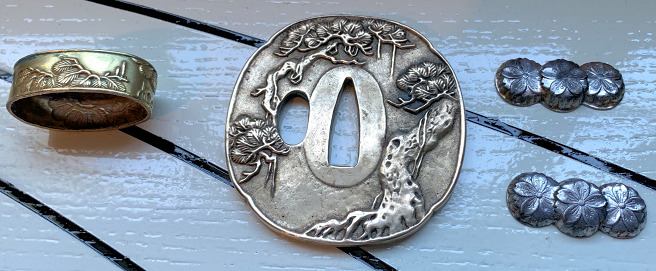
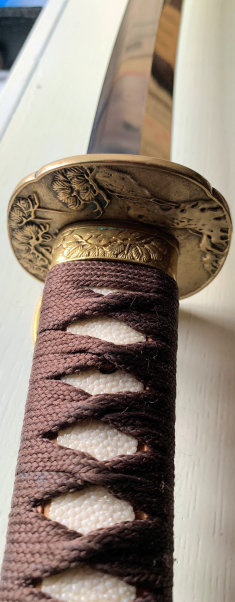
I polished with Metal Glo and then with Peek. The patina in the deeper sections actually helps highlight the decorative shapes:
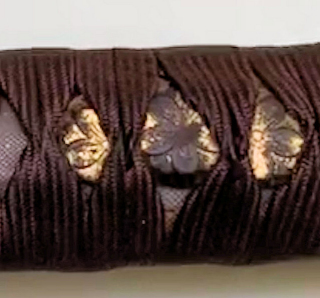
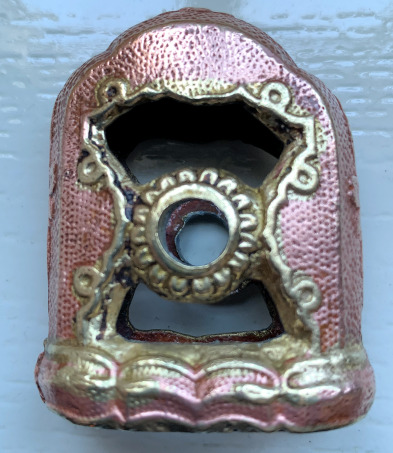
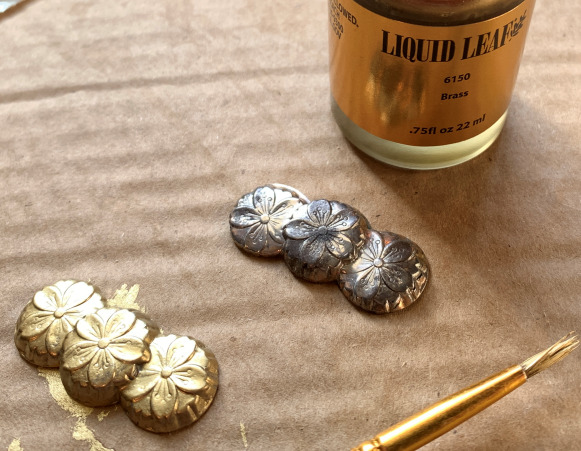
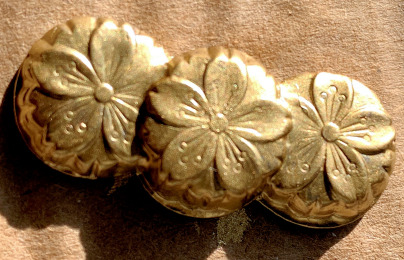
The finish had worn off of the menuki and there was a lot of tarnish. Cleaning & polishing actually made them look worse:
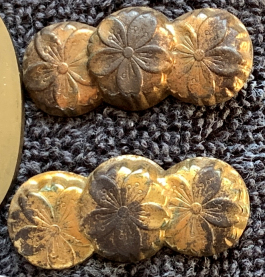
I didn’t want to replace them because the goal was to restore where possible, not replace. I compromised by painting the originals with Liquid Leaf Brass, a product I swear by. (They no longer make their copper paint, which is a shame because it was amazing.) Apart from the saya, this was the only painting I did on this project:
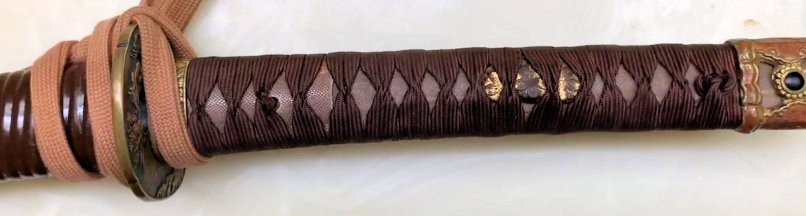
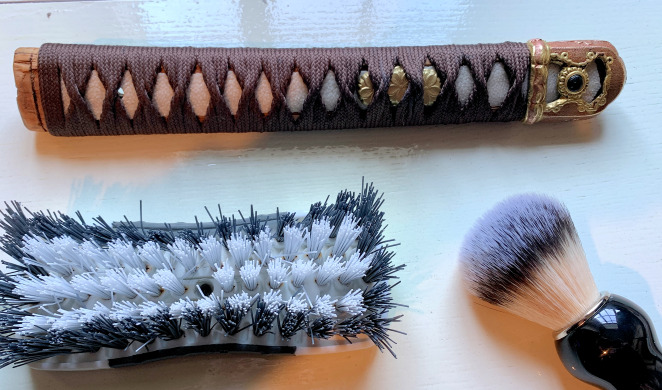
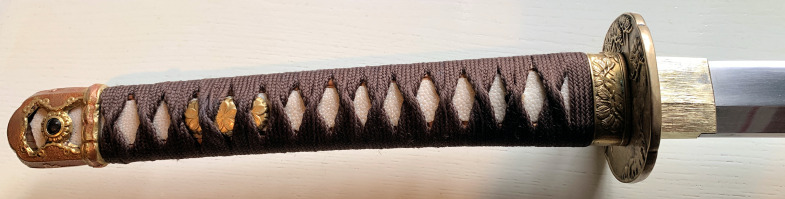
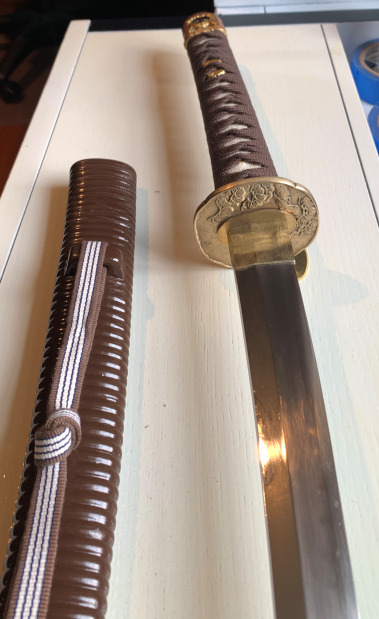
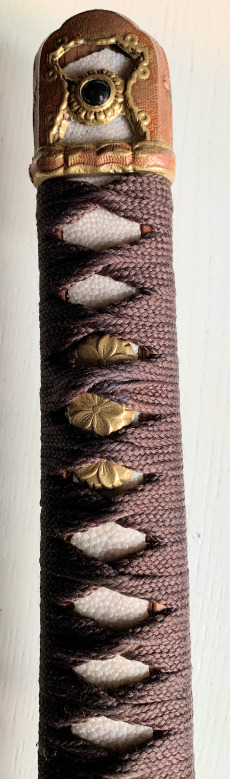
I rewrapped the tsuka with a new brown cotton ito:
There’s an entire art, tsuka-maki, devoted to handle wrapping. I would never come near the expertise of these artists, but if I was gonna disassemble, repair, and customize samurai swords, I had to at least get serviceable at it.
The gunto was my second ito wrap, and my first effort with the little paper hishigame wedges. I simply couldn’t figure out how to make them work. Some of it was me not having good tools; most of it was me not having good skills. All my attempts using hishigame ended up looking worse than without them.
I decided that, as a total neophyte in restoring & repairing katana (much less katana with at least some historical value), being obsessively completist was useless if my inexperience made it look worse than it would if I wasn’t obsessively completist.
So I wrapped it without the hishigame:
I didn’t document the saya restoration, but it was mostly just a repaint. It was rattan-wrapped, thick with old scarred brown paint. I stripped off the paint and scrubbed it clean with stiff brushes. I’d never worked with rattan and didn’t want to sand it.
I don’t recall having to repair the rattan itself — I think I’d remember if I had, because contouring it around the kurigata and tapering the ends to fit flush looked tricky.
Really I just stripped it, cleaned it, scrubbed it with TSP to remove residue, and rattle-canned it primer gray. Then I rattle-canned a terracotta color that I thought would look great but ended up too orange.
I tried again with a more chocolate brown, and was happy to see that the orange underneath tinted it just a tad, giving it a unique color that still recalled the original. I let it cure and then clear-coated it with Rustoleum spray gloss.
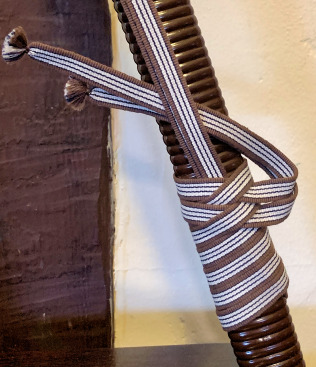
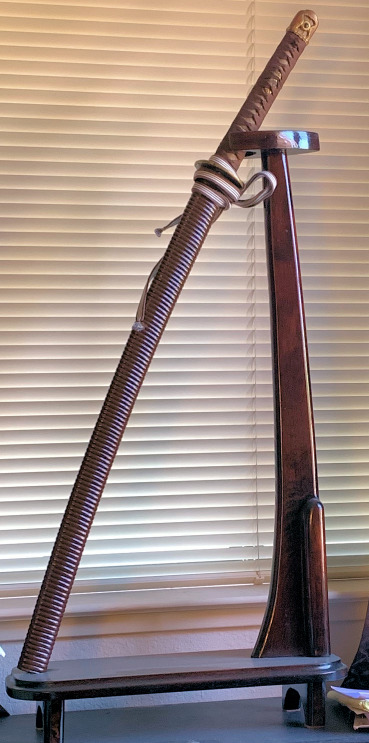
I bought a brown-and-white Sanada-Himo cotton sageo that looked great with it:
The koiguchi (scabbard opening) was very loose, and I shimmed it in three places with maple veneer.
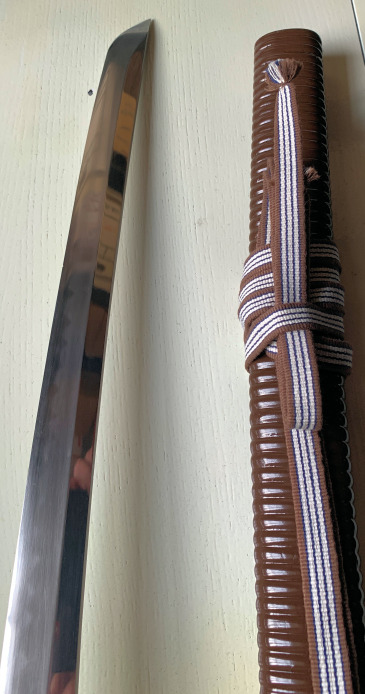
The blade had light pitting. I was hesitant to be aggressive cleaning it because I might be ruining a good blade, and because it really was a tired blade. I settled for a straight-up clean with denatured alcohol and a mild polish with Peek.
The edge was fairly dull, but I was nobody’s proficient sharpener (still ain’t, though I’m better), and, again, I didn’t want to ruin what might prove to be a valuable blade. I settled for stropping it.
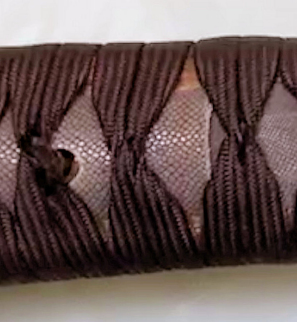
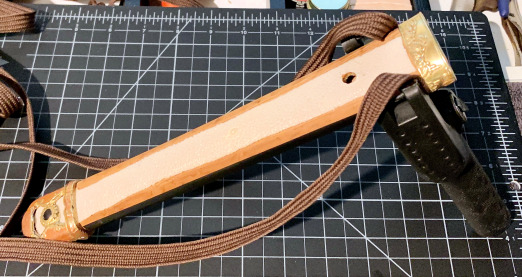
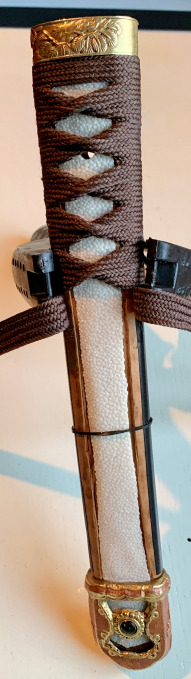
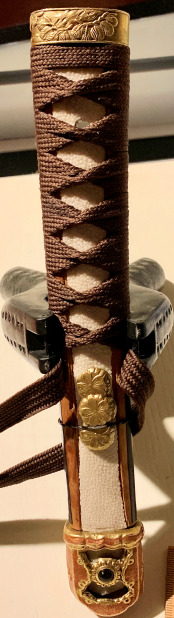
Then I put it all back together. I was happy about the improvements and the overall look, especially given how new I was at this:


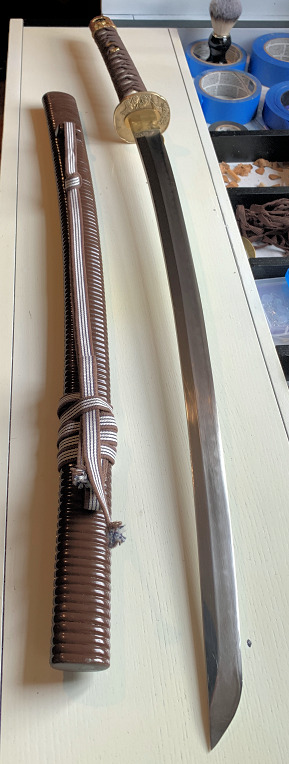
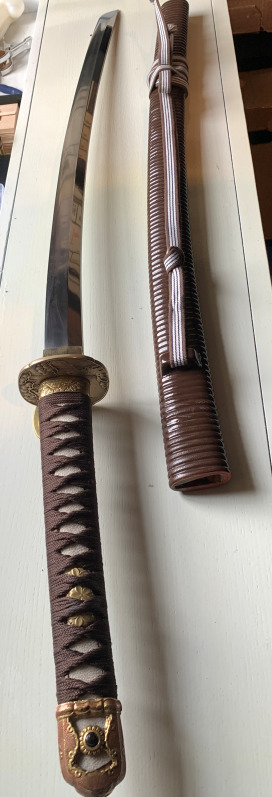
To be honest, the sword feels odd in the hand. The blade’s a bit short, just under 25″ from tip to tsuba, a bit thick, and very front-heavy.
Because of the nature of this katana, I feel bad about mistakes I made and subpar work I did, most visibly on the tsuka. I wince a bit at the samegawa shrinkage and poor fit that exposes the tsuka wood. It ruins the lines of the ito diamonds. Nowadays I’d know to at least wrap the ito tighter and make the diamonds smaller to minimize that exposure.
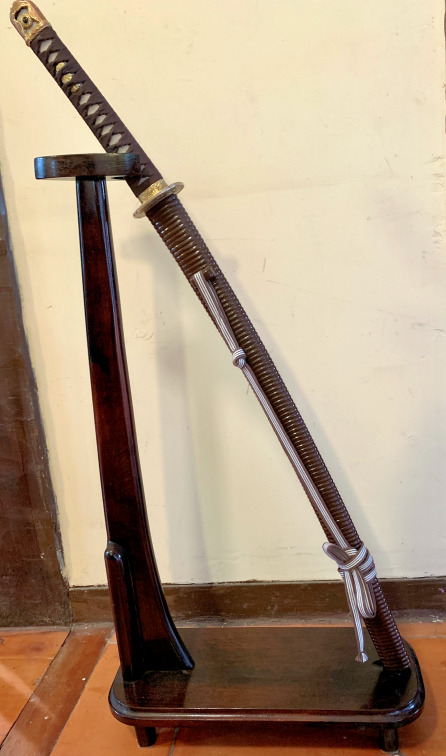
I found a beautiful brown tachi-kake stand on Etsy, almost Deco, made by an artist in Ukraine, and I decided wotthell, let’s give this old soldier a good home:
I’ve learned and improved a lot since I worked on this gunto, and I get the feeling I’ll revisit it one day to upgrade some of the repairs I made. I worry that, if I don’t, it’ll rattle chains and haunt the house.